English
 français
 Deutsch
 русский
 italiano
 español
 Nederlands
 العربية
 Türk
Türk עברית
עברית


- Tel : 0086-020-34704480
- Fax : 0086-020-34704479
- E-Mail : asia-inflatables@vip.163.com
- Contact person : Grace
- Address : Room 55-57, 3F,1 St,Lingnan E-Commerce Industrial Park, Luopu Street, Panyu District, Guangzhou, China


 Set Up and Take-Down Instructions
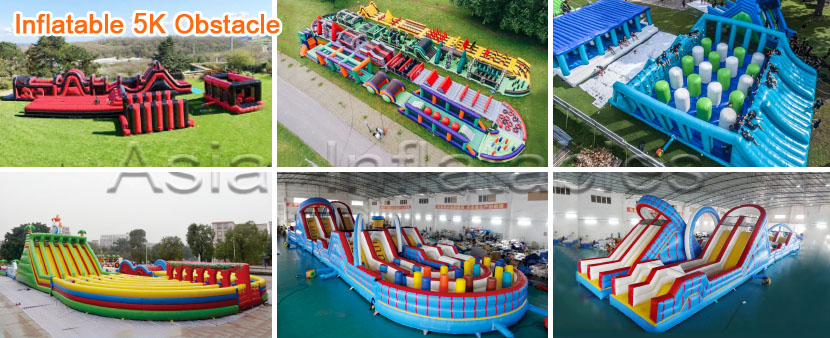
Set Up and Take-Down Instructions for Inflatables
Set Up
1. Take the unit out of the storage bag and undo the straps.
2. Lay down the tarp at the location where the unit is to be set up (concrete or grass).
3. Unfold the inflatable and lay it down onto the tarp paying close attention to where the entrance/exit is supposed to be.
4. Once the unit is on the ground it is now time to plug in the blower (some units have more than one air flow tube, use the one that is more convenient for you and close the extra air flow tube using the tie belt and clamp around it). Also, check to make sure that all the zippers are closed otherwise the unit will lose air tremendously and will not properly inflate.
5. Once you have the blower hooked up into the air flow tube go ahead and plug the blower in to the electrical outlet then turn the switch to the "on" position. The inflatable should start to go up momentarily and should be completely aired up within just a few minutes. Some parts of the unit (castle cones, tropical trees and so on) might need your help while in the airing process - give it a little push with your arm to help those parts get towards their desired position. On any flat roof unit - while the unit is being inflated pay close attention to the alligator clips that attach the roof to the castle, make sure those clips are not caught on anything like vinyl or netting so that they don't cause damage.
6. On regular jumpers and combo units - tie downs are located on the side of the units near the bottom. You need to either secure the unit with the spikes that are provided (if set up on grass) or sandbags (if set up on concrete or indoors). When using the spikes to anchor down the units - pay extra attention to the grass area where the spikes are to be used to make sure there are no water sprinklers and/or gas pipes/lines.
7. On slides and water slides the tie downs are located on the side of the unit towards the middle. Follow the same spike/sandbag instructions by using belts going between the unit and the ground that it's set on. You will need to either secure the unit with the spikes that are provided (if set up on grass) or sandbags (if set up on concrete).
8. Water slides are mostly used with constant water running down the slide using misters also known as a soaker hose. We have built in hooks at the arch of the water slides that will make it simply easy for you to run the hose thru (as the hose sits there at the arch while wetting the slide portion). You can hook up the soaker hose to a regular garden hose and then run it across the top (for those units that have a pool at the bottom please make sure you fill up the pool first with the garden hose before you connect the hoses to each other). Make sure the pool is filled up at least ¾ before any children start using the unit. It is very unsafe for anyone to slide into a pool that is not filled up as it can cause serious injury.
9. As you have the unit (s) up and running, please make sure that all attendees as well as supervising staff are aware of the warning sign(s) that are on any inflatable. Go over all the rules posted on the warning sign and make sure all questions are answered. Leave a phone # with the person in charge that way you can be contacted should any problems arise or in case of any questions, concerns or emergencies.
Take-Down
1. Once the unit is done being used and ready to put away - unplug the blower and open the air flow zipper(s) for quicker deflation. Some units (mostly larger ones) will have more than 1 air flow zipper , please check all around and make sure they are all undone for best and quick results. Wait a while for all the air to be out of the unit. You may also step onto the unit (along with help from others) to speed up the process.
2. While stepping onto the unit to get all the air out, you can start folding the unit into 1/3 (if the unit is square shaped then 1/3 fold will not matter on either side, if unit is oblong then get the width into 1/3). Once you have it folded, start rolling the length as tightly as possible from one end all the way across to the opposite end. This will not be easy to do and you might require some help from others while in the rolling process. The tie down straps with a ring at the end of it are to be used once you have the unit rolled up. After it has been tied down with the straps you can go ahead and stand the unit up onto the ground or dolly to be moved to a desired location or vehicle. We always suggest that the unit goes back into the storage bag before moving it and while in storage. This will prevent it from being damaged as well as add to the lifespan overall.
3. It is always best to clean the unit before folding it and putting it away if possible. Sometimes you're not able to do the cleaning procedure before the fold up; in that case you can always clean it before the next set up or before/after storage.
4. Clean up for any water unit - after the water has been disconnected you can keep the blower running while you dry out the unit (unless it's easier for you to dry off while it's flat on the ground). You can also keep the unit exposed to the sun/air for airing out purposes. The air flow zippers may be opened and left open for air-out reasons. Make sure that the unit is completely dry before it is folded up and put away to avoid from getting it moldy and smelly.
Our staff is always available to help with any questions regarding set up, usage as well as clean up and/or fold up procedures. Feel free to give us a call anytime as assistance is needed at 0086-020-34704480